n8n Workflows
- Automated Export of Quickbooks Online Data with n8n – With Tutorial (JSON Direct Link | n8n template link)
- QuickBooks Automated Invoicing – Sync Google Sheets with QBO (JSON Direct Link | n8n template link)
- QuickBooks Online AI Agent – Chat with Quickbooks Data with GPT Agent (JSON Direct Link | n8n template link)
- Chat with QuickBooks data using an AI agent in n8n (JSON Direct Link | n8n template link)
Video
Video Summary
Integrating QuickBooks with other tools can unlock powerful automation possibilities, from generating reports to creating AI-powered workflows. Using a no-code tool like n8n, you can build these integrations without writing a single line of code. This guide will walk you through the entire process, from setting up your development environment to building advanced AI agents that can chat with your QuickBooks data.
1. Setting Up Your Environment
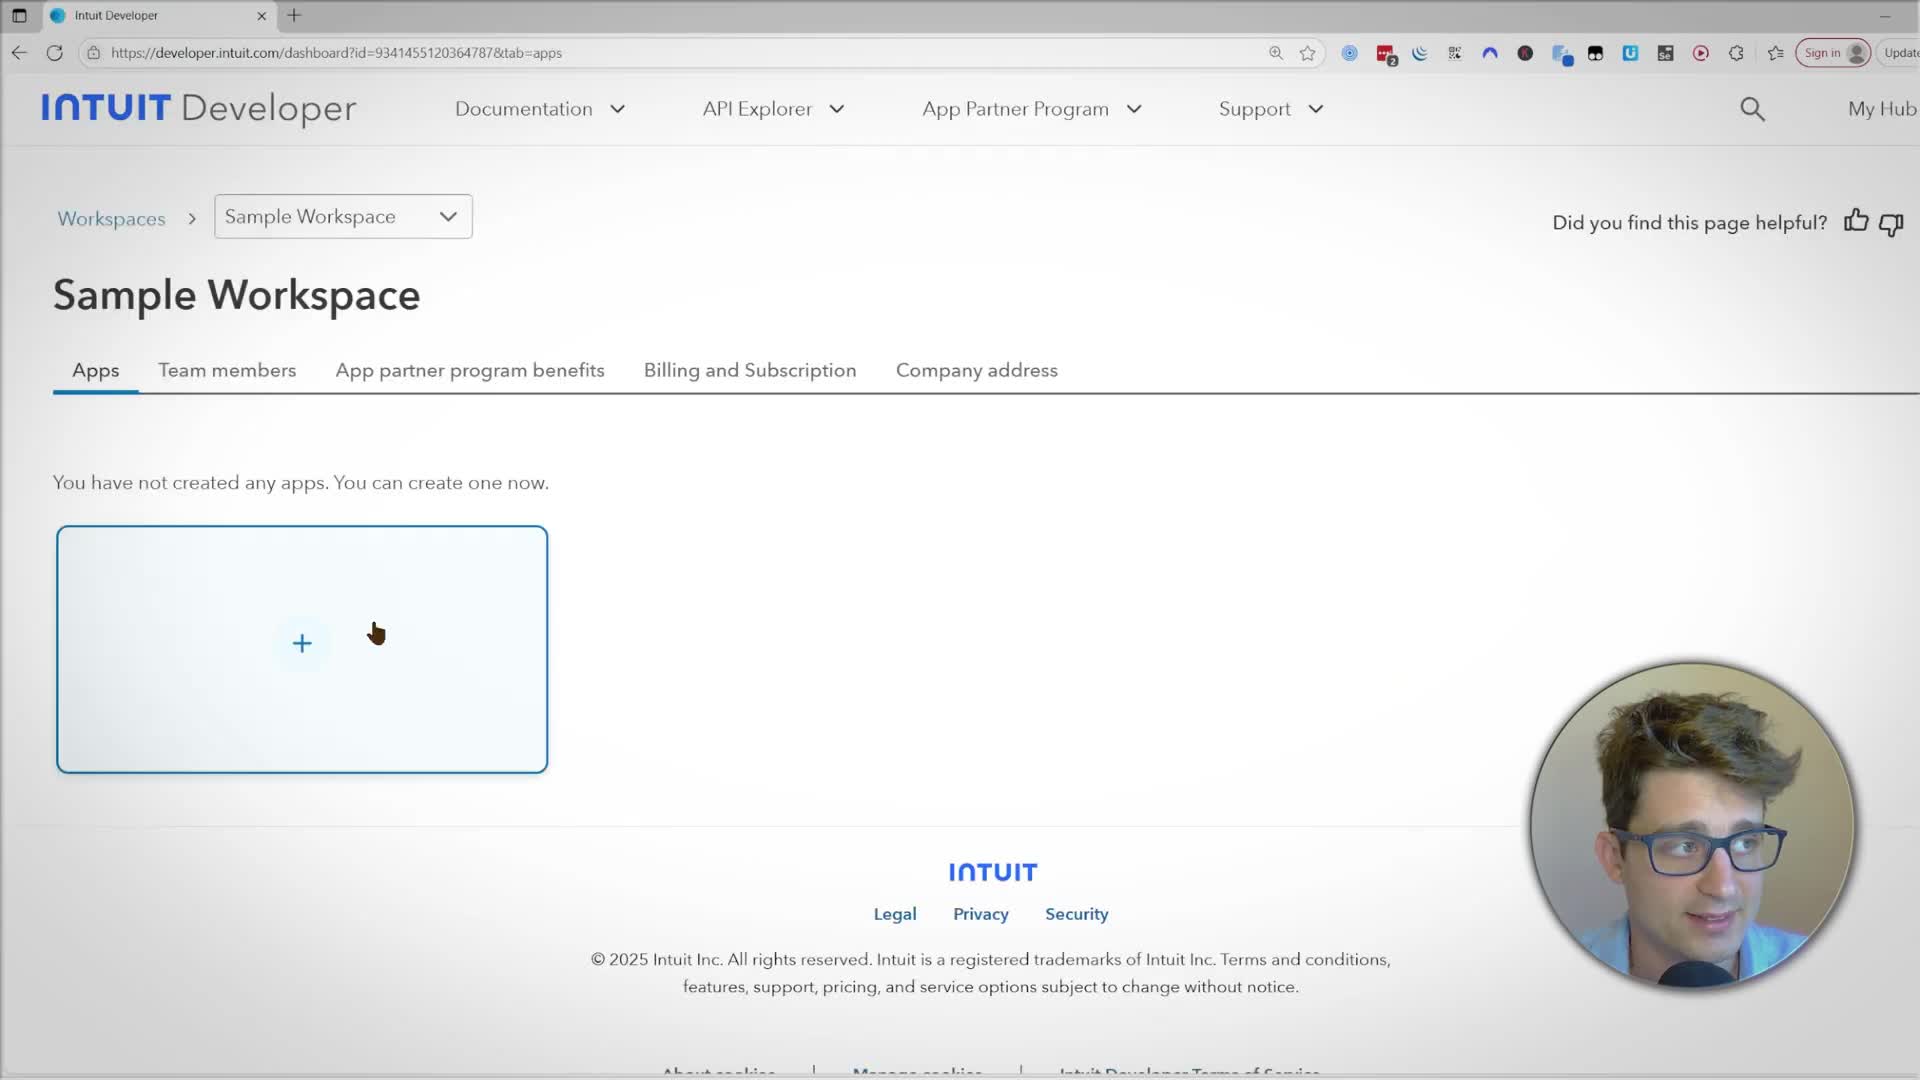
Before you can build any workflows, you need to connect n8n to QuickBooks. This involves creating a developer account and a new application within the Intuit Developer portal.
Create a QuickBooks Developer Account and App
First, navigate to developer.intuit.com and sign up for a developer account. Once registered, go to the ‘App dashboard’ to create your application. You’ll be prompted to give your app a name and select the necessary permissions (scopes). For simplicity, you can select both ‘Accounting’ and ‘Payment’ scopes.
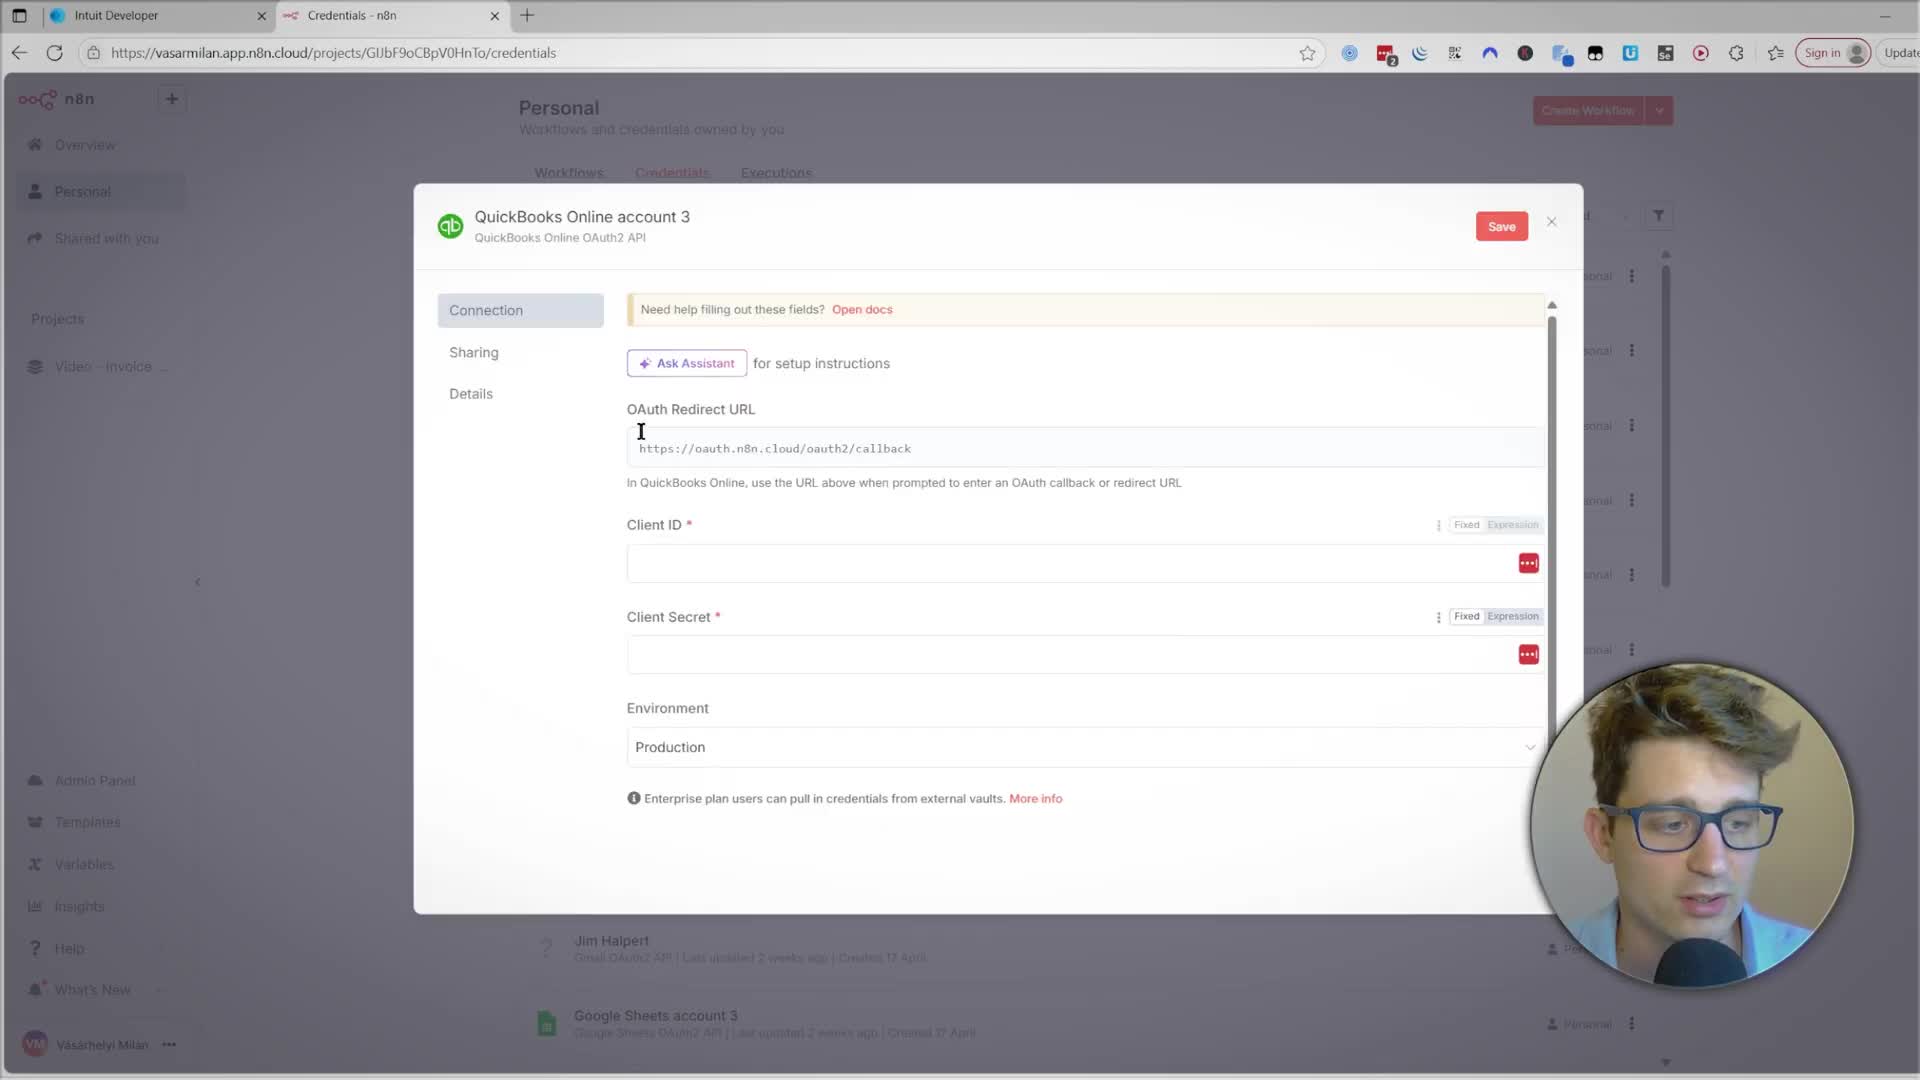
Connect n8n to Your QuickBooks App
After creating your app, Intuit will provide a ‘Client ID’ and ‘Client Secret’. Now, open your n8n instance and create a new credential for ‘QuickBooks Online OAuth2 API’. n8n will provide a ‘Redirect URL’.
1. Copy the Redirect URL from n8n.
2. Go back to your app’s settings in the Intuit Developer dashboard, find the ‘Redirect URIs’ section, and paste the URL there. Save your changes.
3. Return to the ‘Keys & Credentials’ section in the Intuit dashboard, copy your Client ID and Client Secret, and paste them into the corresponding fields in n8n.
4. Set the ‘Environment’ in n8n to Sandbox for testing purposes.
5. Click ‘Connect my account’ and follow the prompts to authorize the connection. Once successful, you’re ready to start building!
2. Extracting Data from QuickBooks
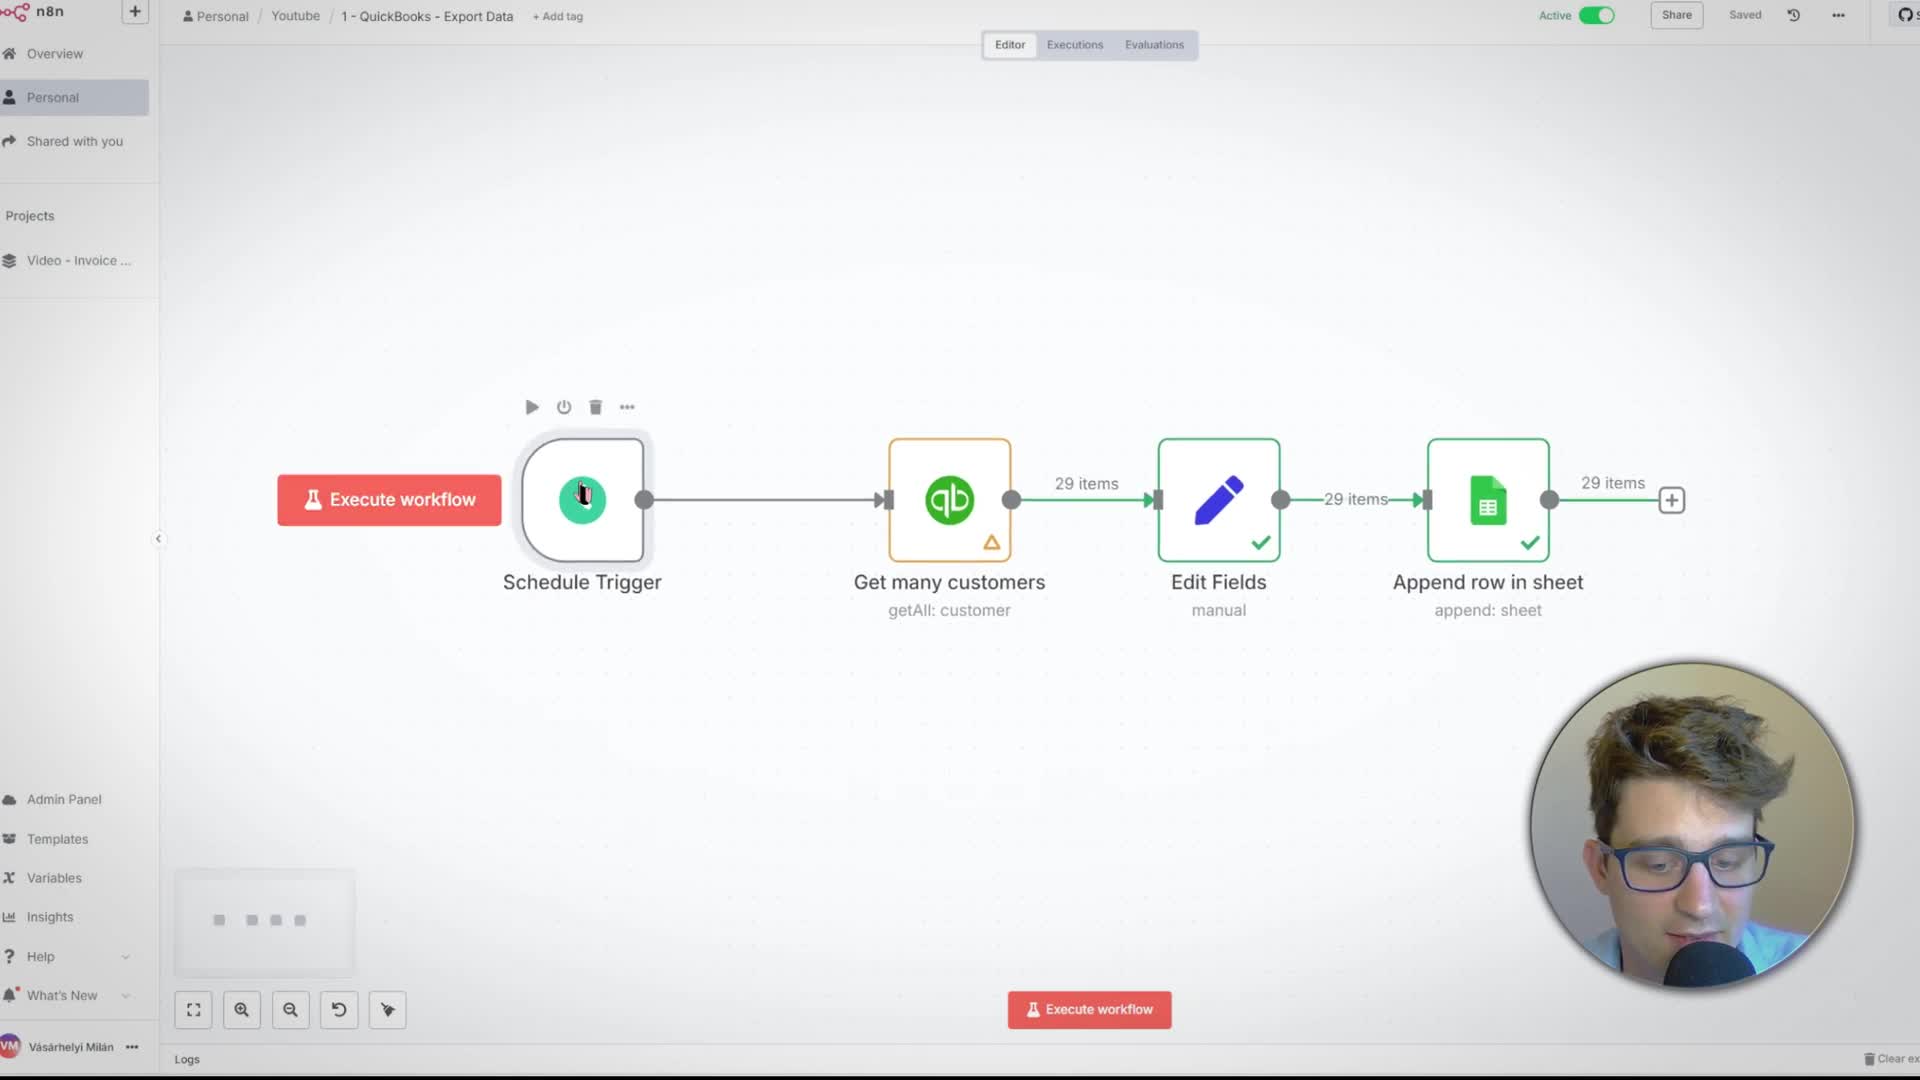
A common use case is automating data extraction and reporting. Let’s build a workflow that pulls a monthly report of all customer balances and saves it to a Google Sheet.
1. Get Customers: In a new n8n workflow, add the ‘QuickBooks Online’ node. Set the Resource to ‘Customer’ and the Operation to ‘Get Many’. Enable ‘Return All’ to fetch all customers.
2. Edit Fields: The QuickBooks node returns a lot of data. Add an ‘Edit Fields’ node to select only the fields you need, such as Id, Balance, and PrimaryEmailAddr.Address. You can also add a new field, like ‘Period’, using a JavaScript expression {{ new Date().toISOString().slice(0, 7) }} to record the current month and year.
3. Append to Google Sheet: Add a ‘Google Sheets’ node and set the Operation to ‘Append row in sheet’. Provide your Google Sheet URL, and set the ‘Mapping Column Mode’ to ‘Map Automatically’. This will match the field names from n8n to the column headers in your sheet.
4. Schedule the Workflow: Replace the manual trigger with a ‘Schedule’ trigger. Set it to run monthly on the first day of the month. Finally, save and activate your workflow.
3. Automating Record Creation in QuickBooks
You can also automate creating records in QuickBooks from an external source. Let’s create a workflow that generates invoices from data in a Google Sheet.
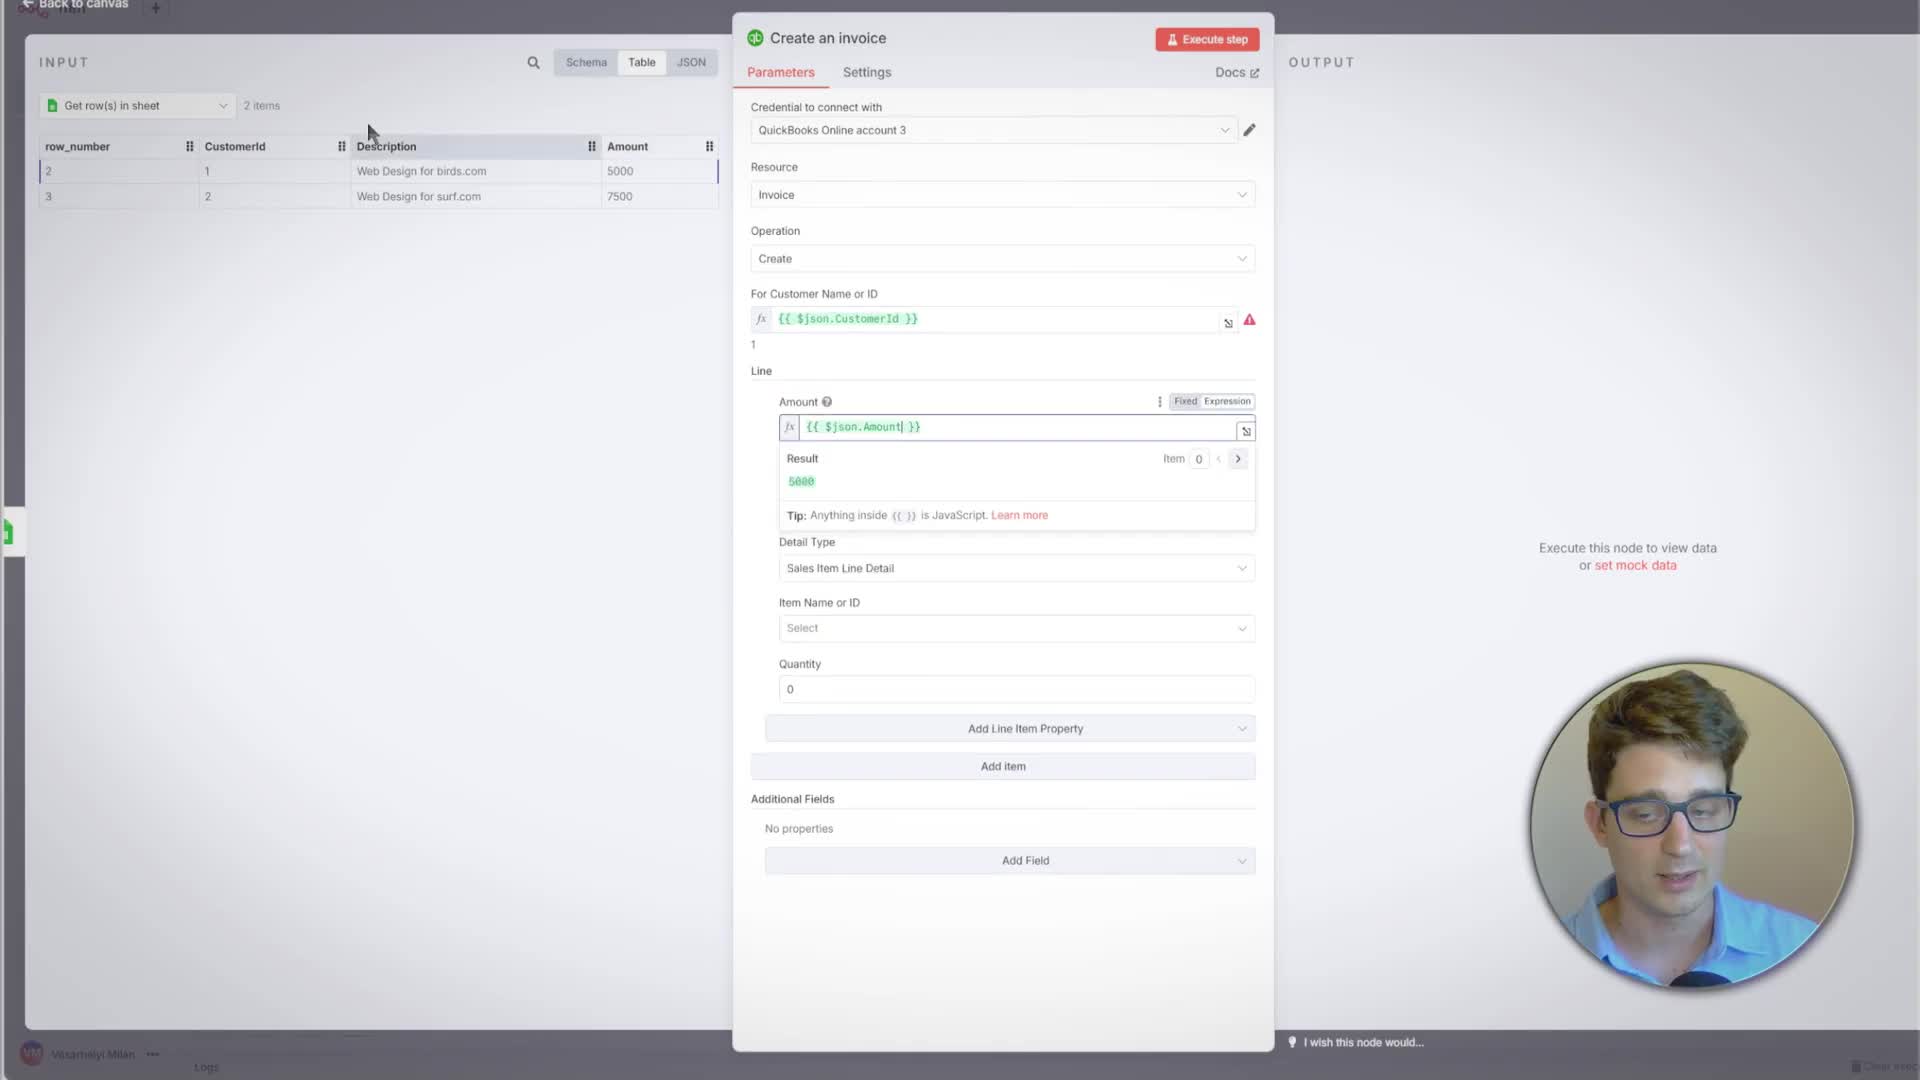
1. Get Invoice Data: Start a new workflow with a ‘Google Sheets’ node using the ‘Get row(s) in sheet’ operation to pull data from a sheet containing ‘CustomerId’, ‘Description’, and ‘Amount’.
2. Create Invoice: Add a ‘QuickBooks Online’ node. Set the Resource to ‘Invoice’ and the Operation to ‘Create’.
3. Map Data: Use expressions to map the data from the Google Sheet. For the ‘Customer Name or ID’, map the {{ $json.CustomerId }}. Do the same for the line item’s ‘Amount’ and ‘Description’. For this example, we’ll set the ‘Item Name’ and ‘Quantity’ to fixed values.
4. Execute: Run the workflow. n8n will iterate through each row in the Google Sheet and create a corresponding invoice in QuickBooks.
4. Building an AI Agent to Chat with QuickBooks Data
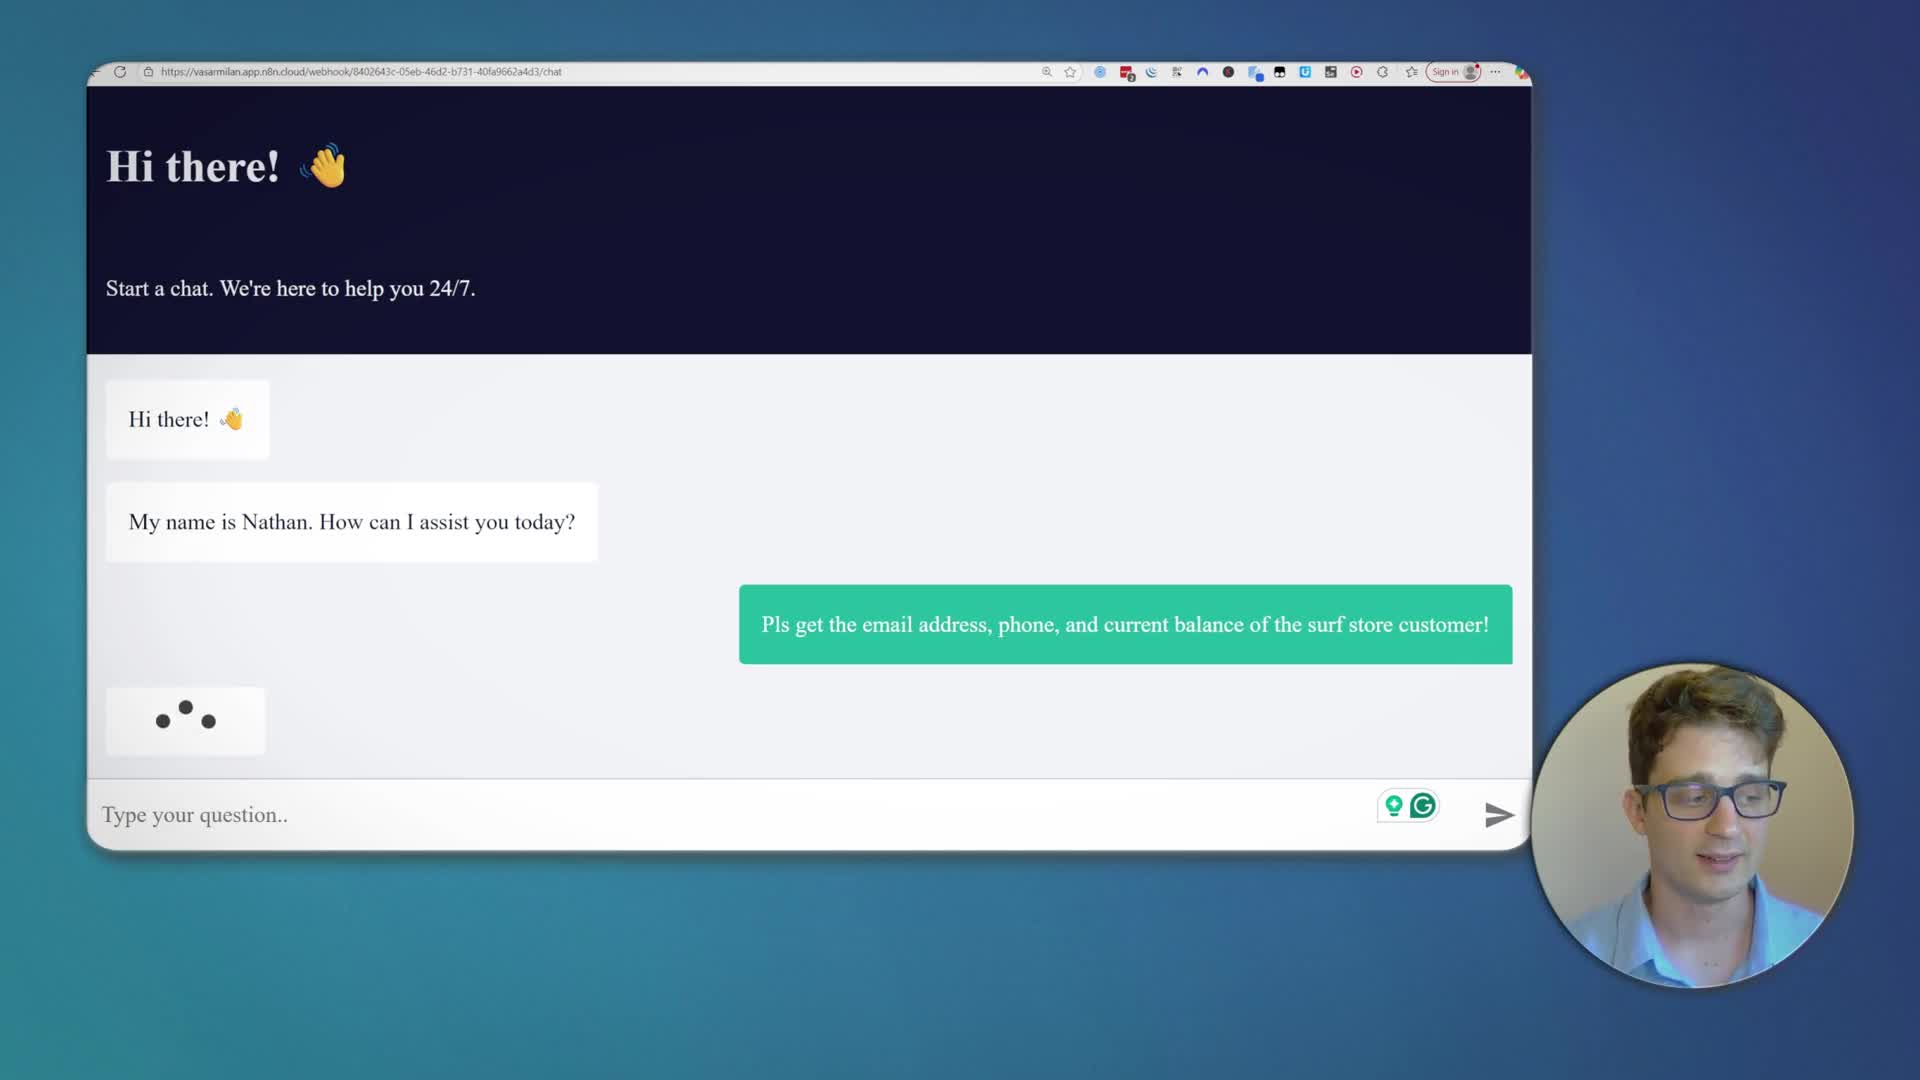
Now for the exciting part: creating an AI agent that can answer plain-language questions about your QuickBooks data.
1. AI Agent Setup: Start a workflow with the ‘AI Agent’ trigger. This creates a chat interface and an agent node.
2. Connect a Chat Model: The agent needs a language model. Add an ‘OpenAI Chat Model’ node and connect it to the agent. Select a model like gpt-4.1-mini for efficient performance.
3. Add a Tool: Tools are functions the AI agent can use. Add a ‘QuickBooks Online Tool’ to the agent. Configure it to use the ‘Get Many Customers’ operation.
4. Test the Chat: Open the chat panel in n8n. Ask a question like, “How many customers do we have?” The AI agent will understand the request, use the QuickBooks tool to get the data, and provide an answer.
5. Share the Chat: To make this accessible to others, go to the trigger node, select ‘Make Chat Publicly Available’, and copy the generated ‘Chat URL’.
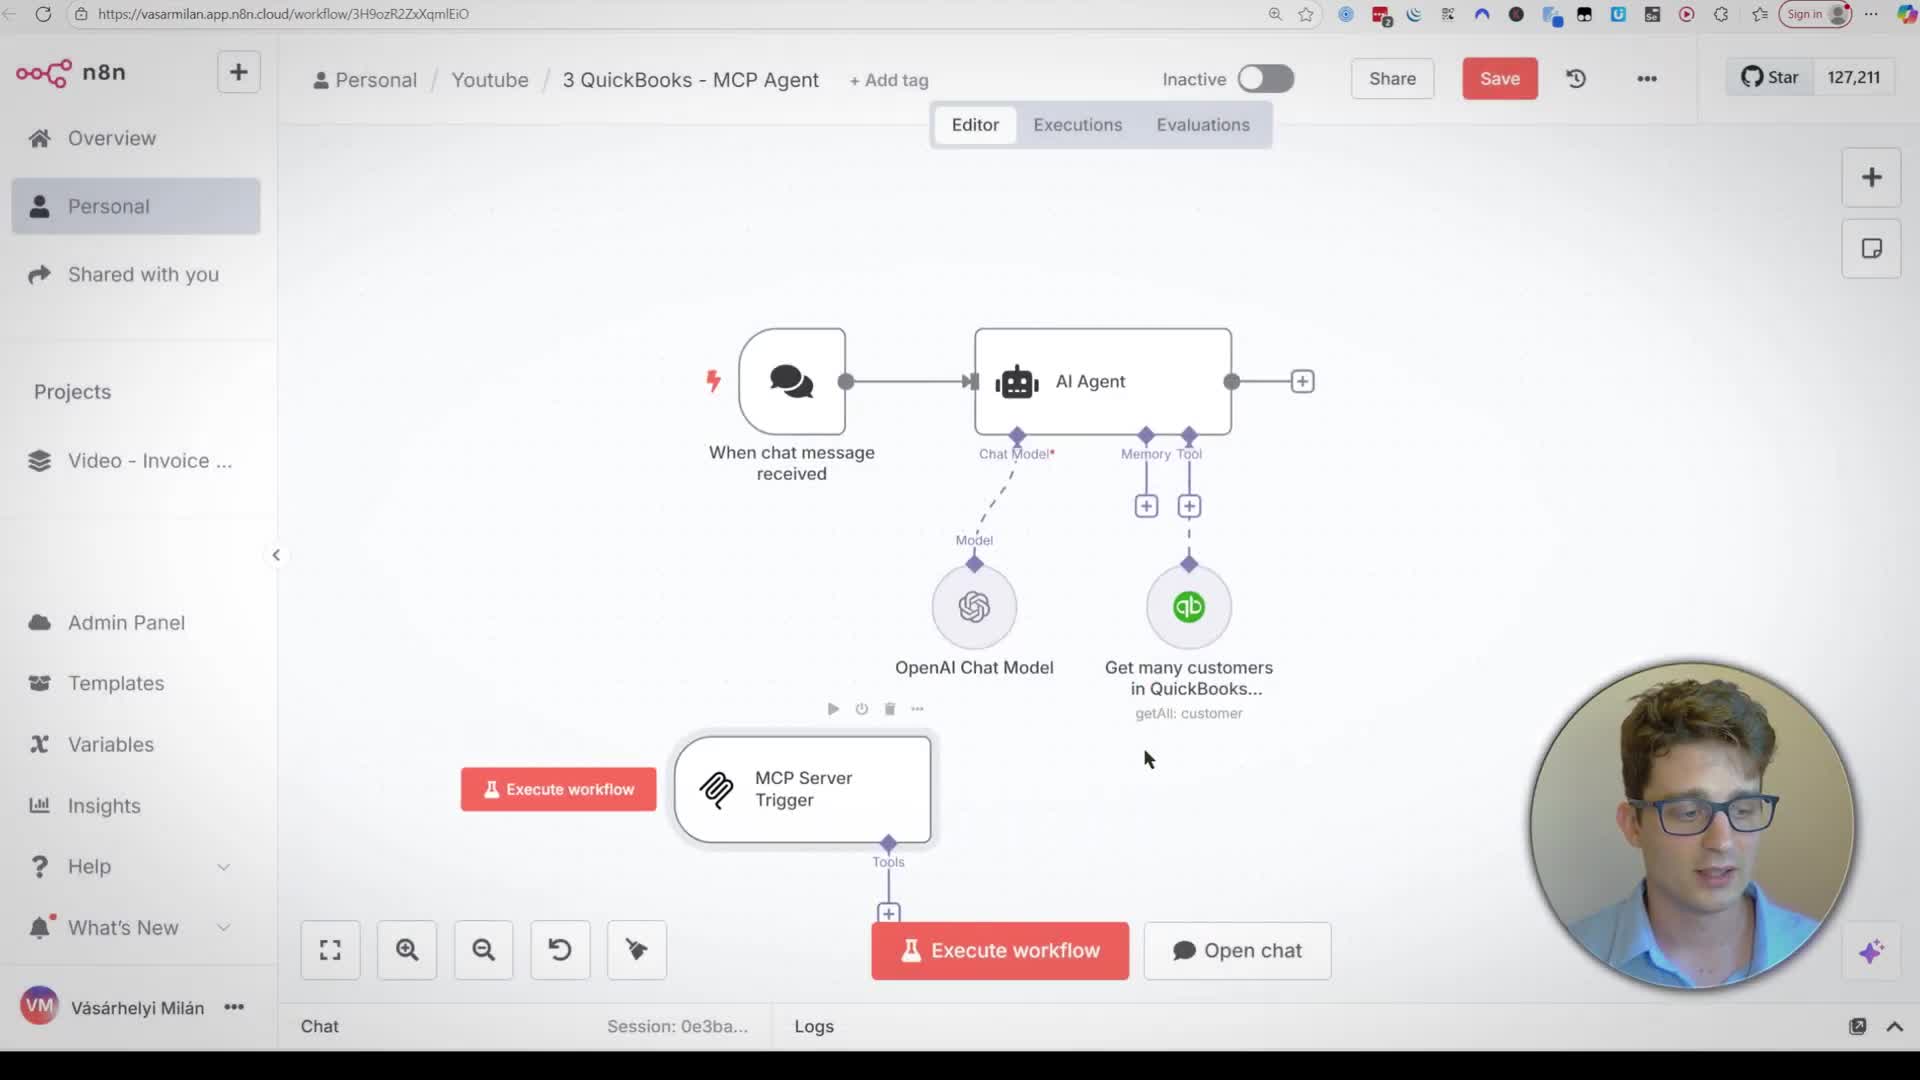
5. Advanced: Using MCP for Tool Collections
If you have many tools, you can bundle them into a single endpoint using the Model Context Protocol (MCP). This allows an AI agent to access a collection of tools through one server.
1. Create an MCP Server: Add an ‘MCP Server Trigger’ node to a new workflow (or the same one). Connect your QuickBooks tool (and any others) to this trigger.
2. Connect the MCP Client: In your AI Agent workflow, remove the direct tool connection. Instead, add an ‘MCP Client Tool’.
3. Link the Server: Copy the URL from the ‘MCP Server Trigger’ and paste it into the ‘SSE Endpoint’ field of the ‘MCP Client Tool’. Now, your AI Agent can call any tool connected to that MCP server.
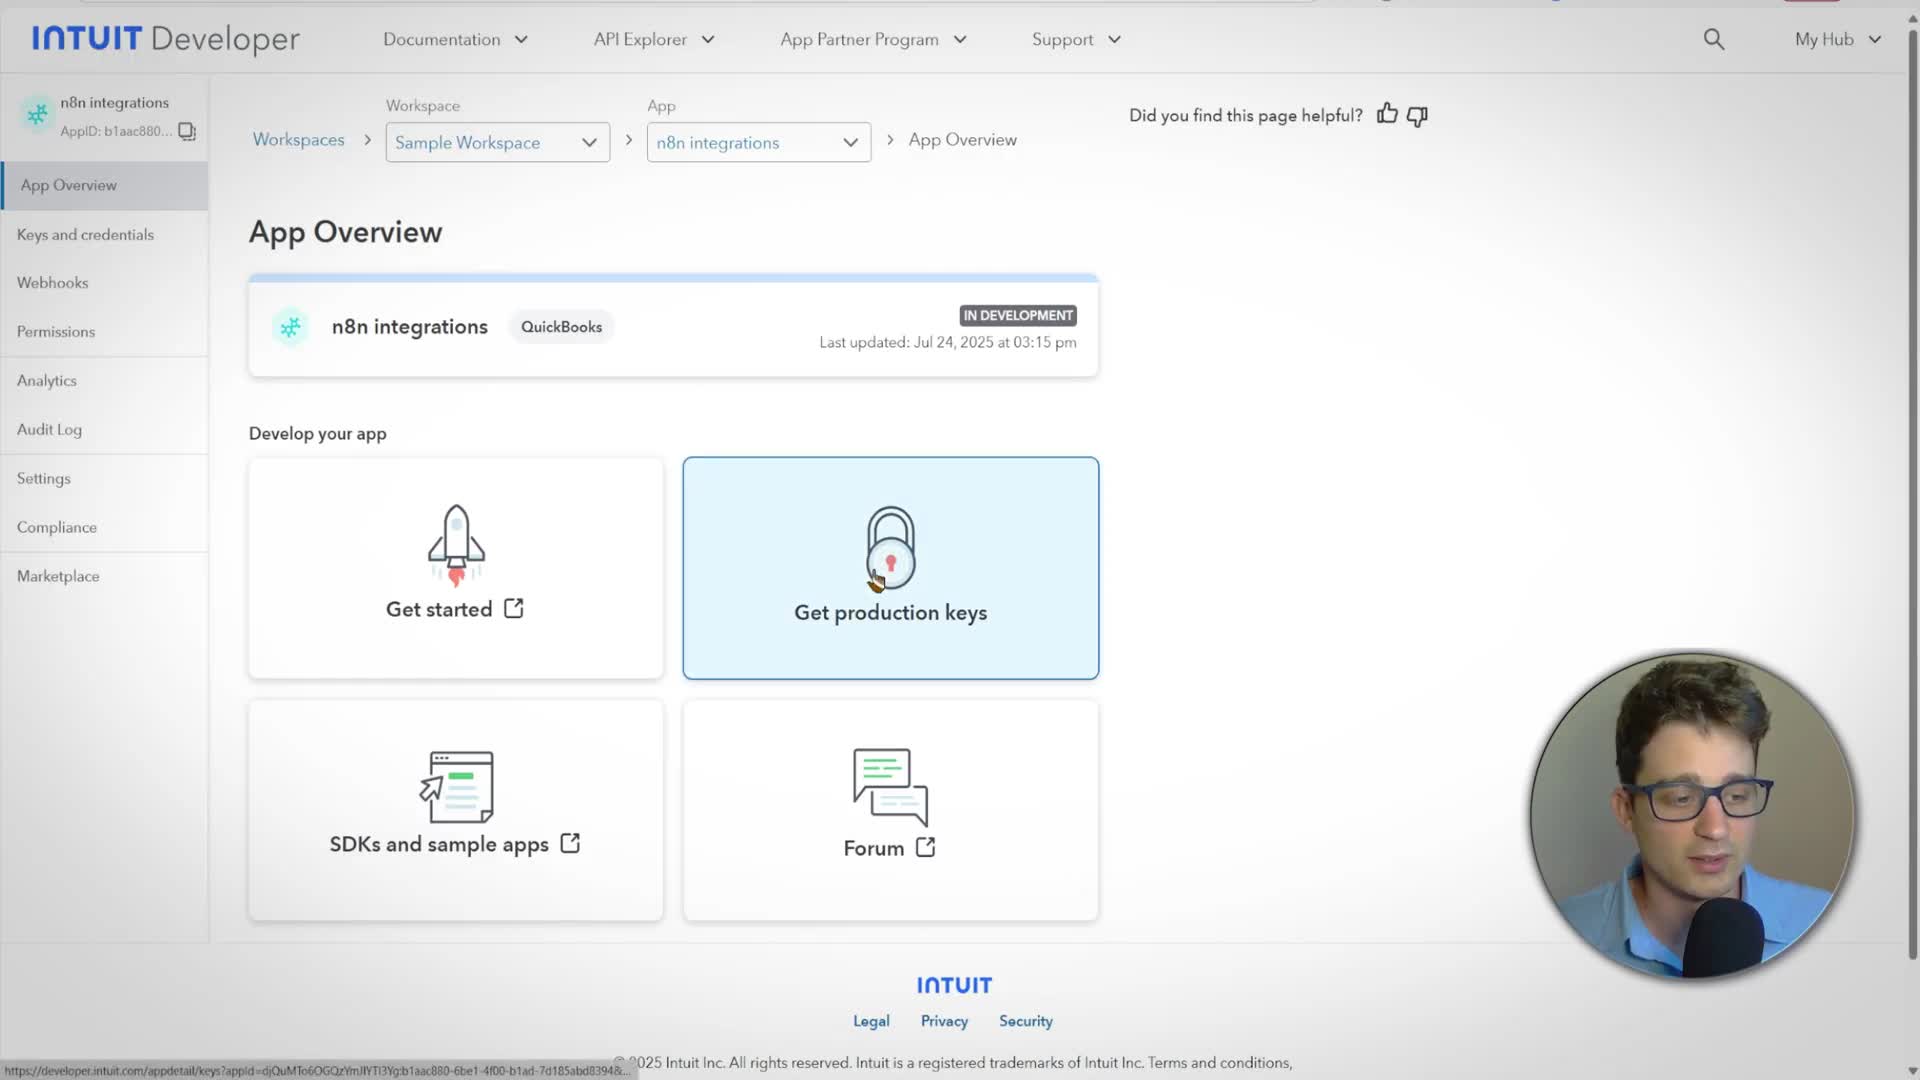
6. App Approval and Production Use
To use your integration with real QuickBooks company data (not just the sandbox), you need to get your app approved by Intuit.
1. Go to Production: In your Intuit Developer dashboard, navigate to your app and click ‘Get production keys’.
2. Complete Questionnaires: You must fill out two forms: ‘App details’ and ‘Compliance’. This involves providing information about your app’s features, how it handles data, and linking to your End-User License Agreement and Privacy Policy.
3. Get Production Keys: After Intuit reviews and approves your app (which can take a few days), they will issue new production-level ‘Client ID’ and ‘Client Secret’.
4. Update n8n Credentials: Create a new credential in n8n using these production keys and set the ‘Environment’ to ‘Production’. You can now use this credential to connect to real QuickBooks accounts.