n8n Workflows
- Airtable SMS Sender – Bulk Text Sender Template for Airtable (JSON Direct Link | n8n template link)
- Google Sheets send SMS with Twilio – Bulk SMS Automation Simplified! (JSON Direct Link | n8n template link)
Resources
Video
Video Summary
Automated text messages are a powerful tool for reaching your customers, whether it’s for order status updates, appointment reminders, or event notifications. In this guide, we’ll show you two methods to manage and send automated SMS notifications directly from the tools you already use: Google Sheets and Airtable.
Method 1: Send Bulk SMS Reminders from Google Sheets
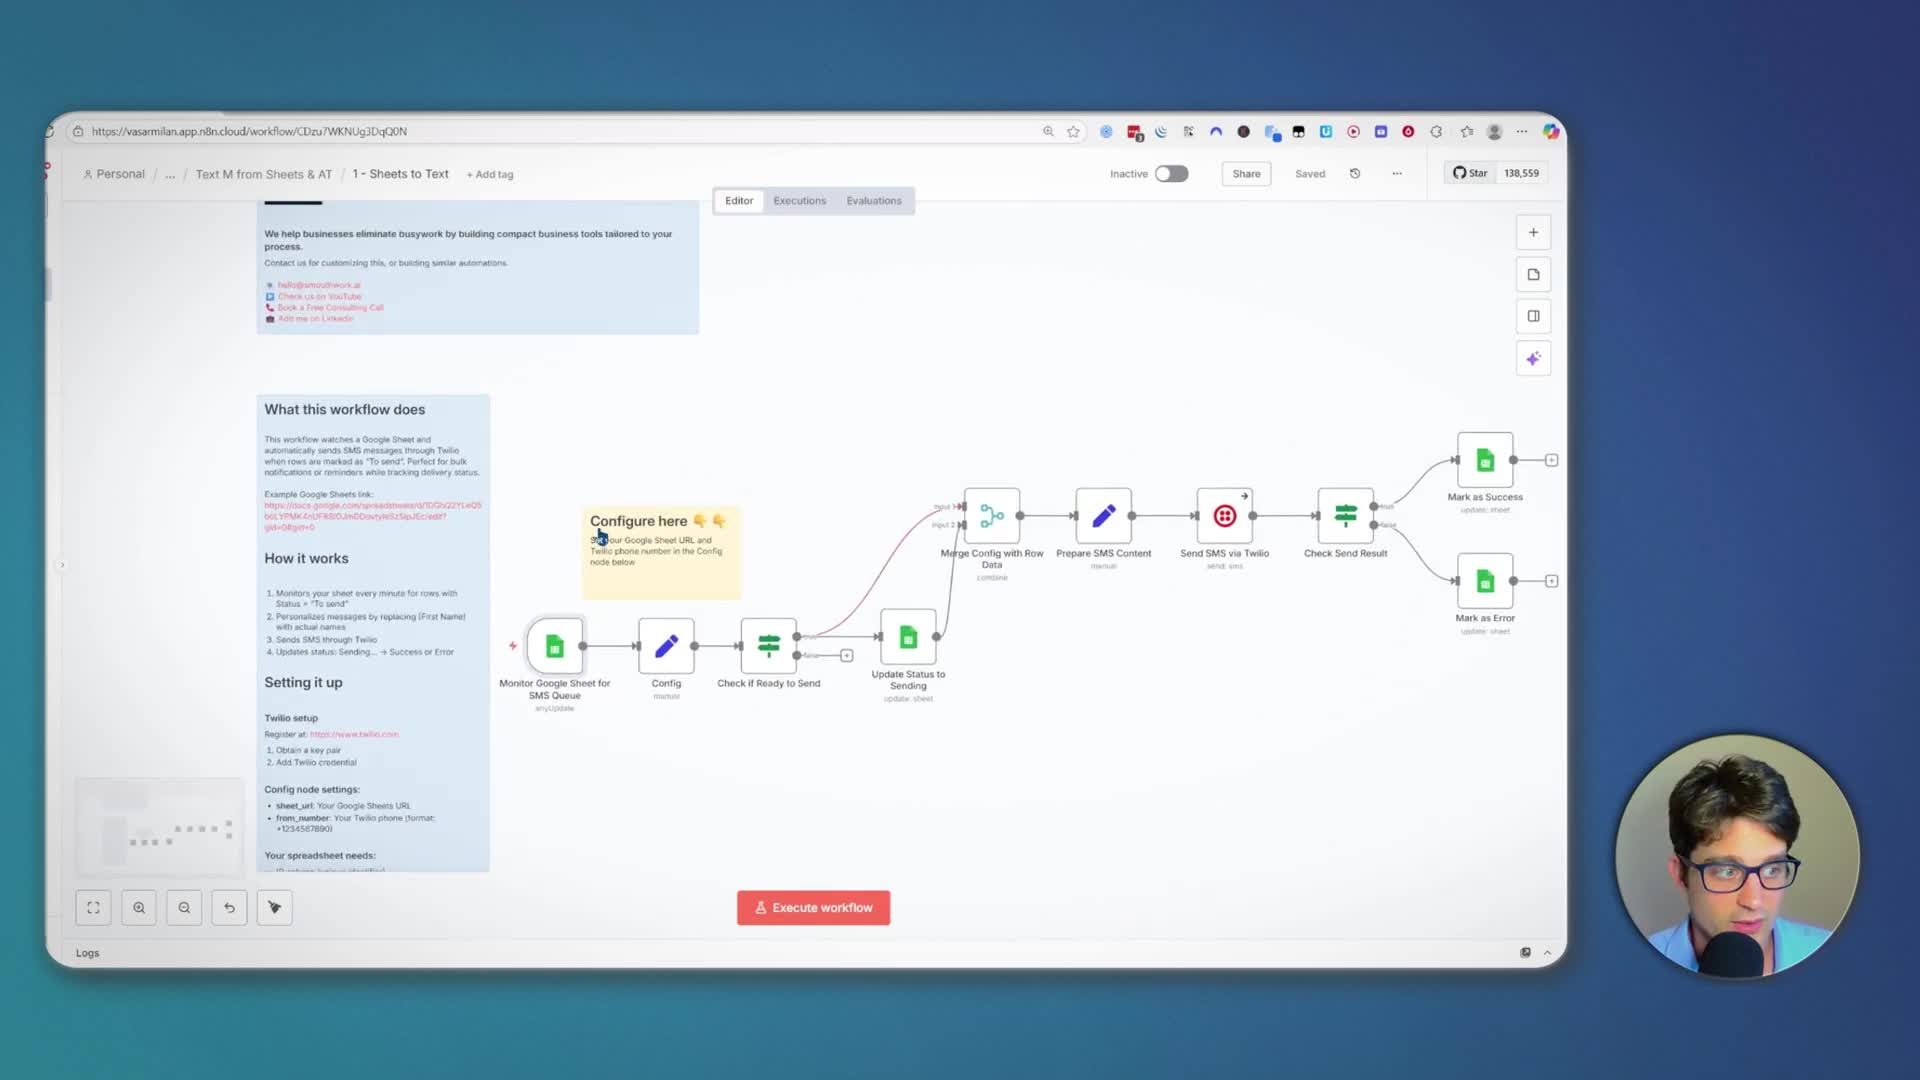
Our first example is a simple, one-time event reminder sent to a list of people managed in a Google Sheet. This is perfect for bulk notifications where you need to send the same message to multiple recipients.
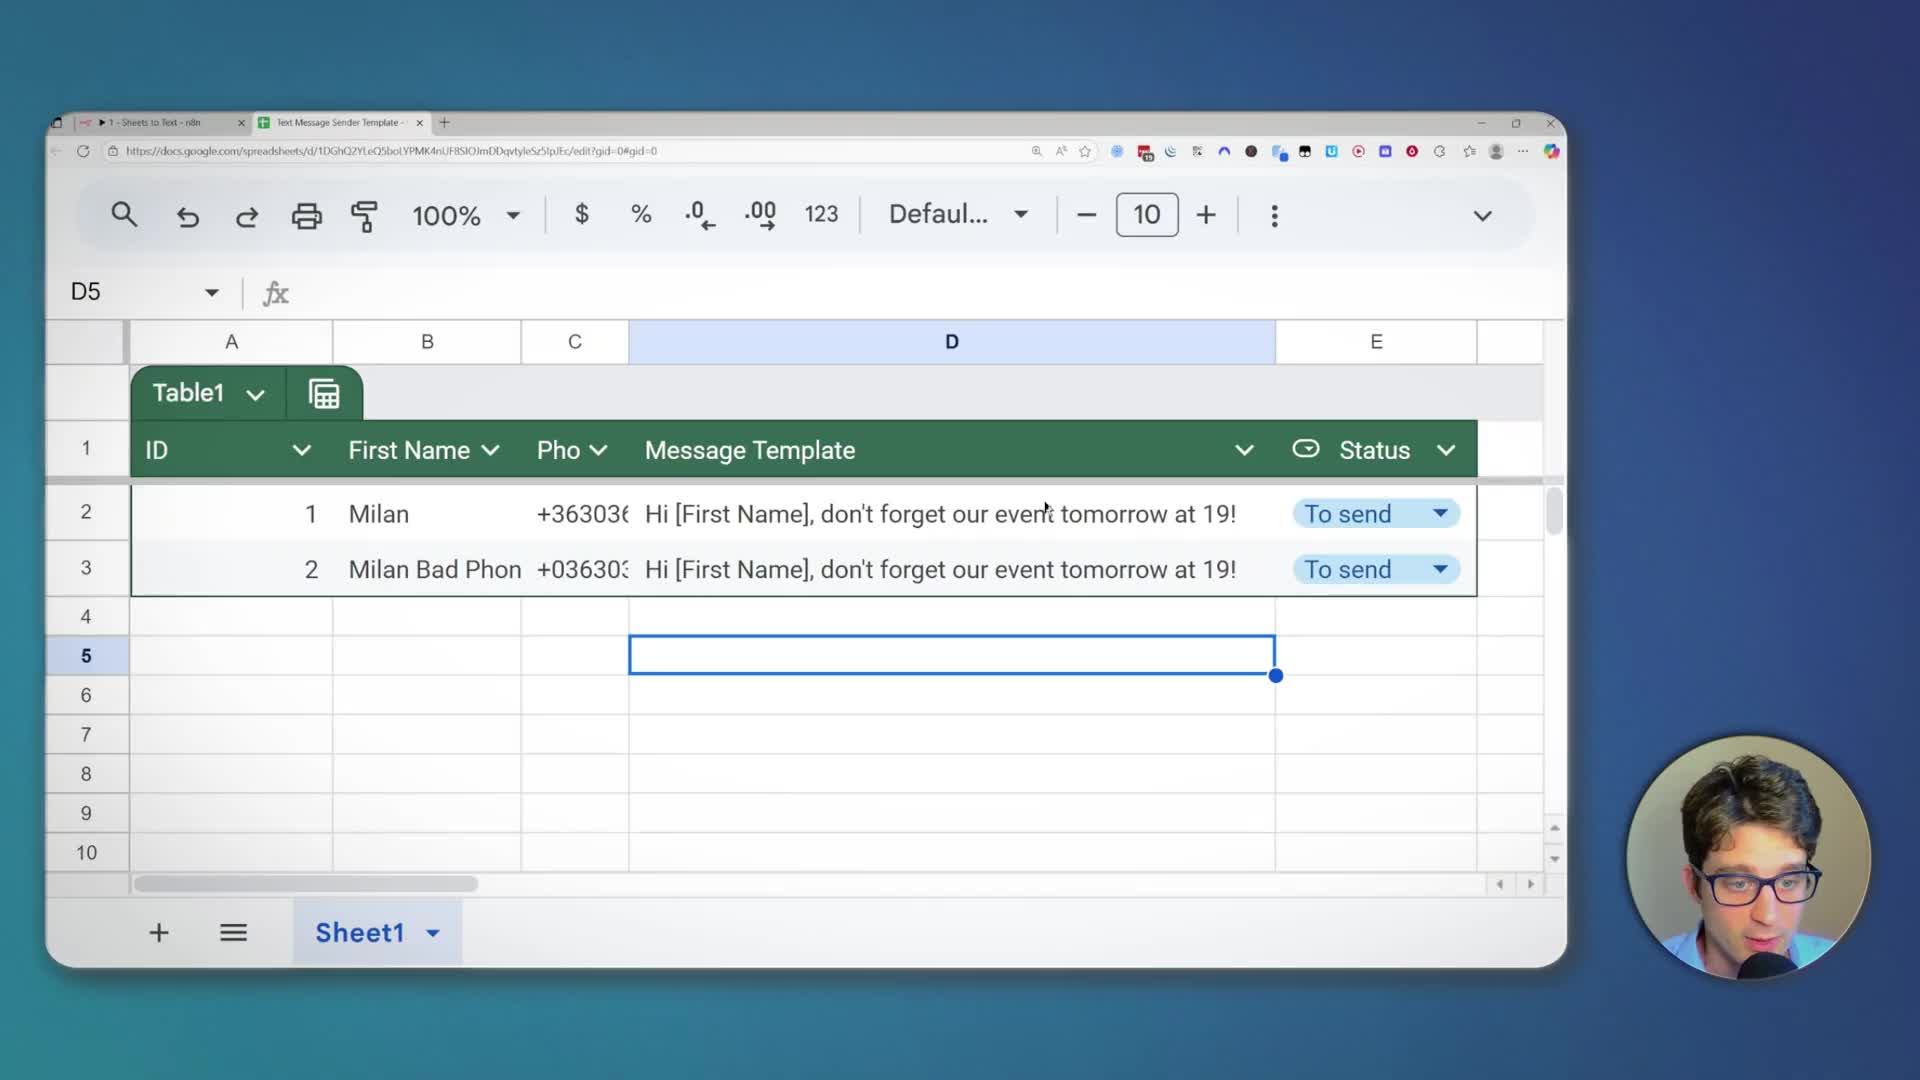
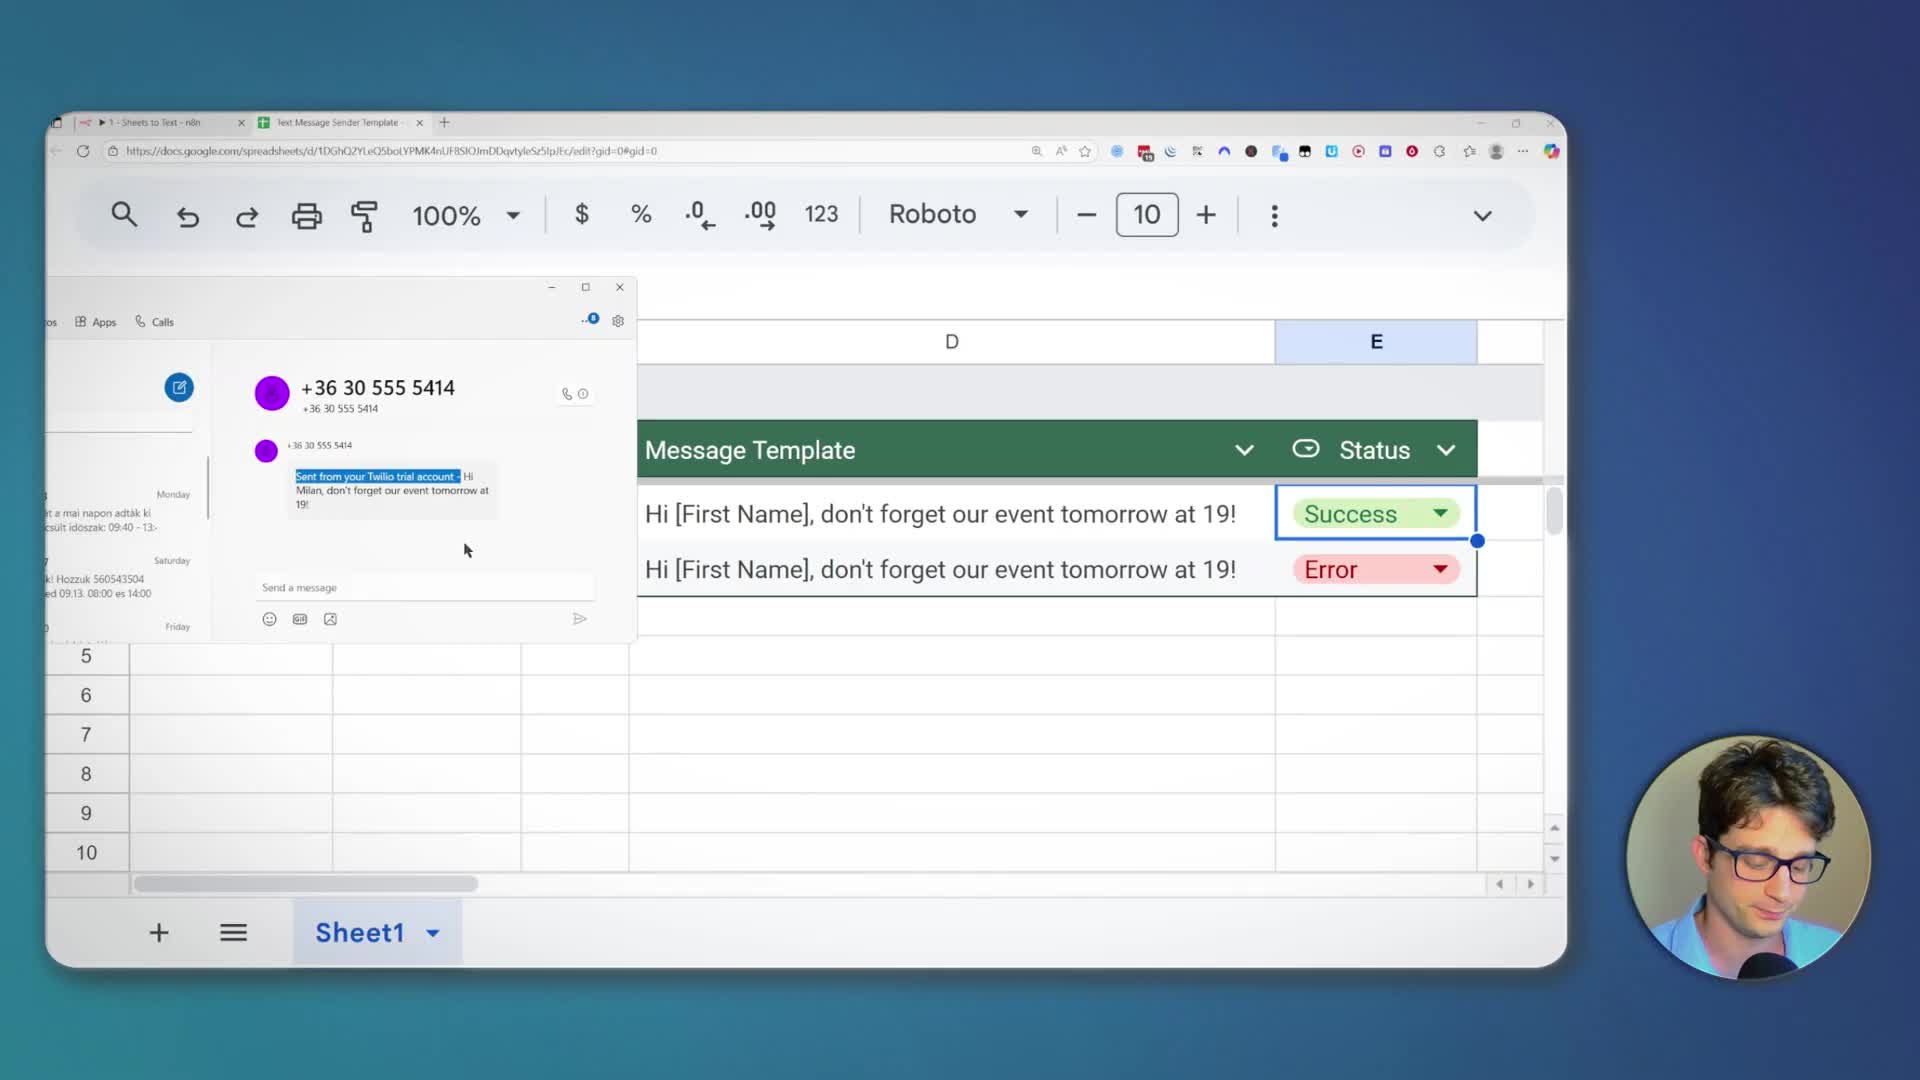
We’ll use a straightforward Google Sheet with columns for ID, First Name, Phone Number, a Message Template, and a Status. To trigger the automation, you simply set the status of any row to “To send”. An n8n workflow running in the background will then automatically send the message and update the status to “Success” or “Error” based on the delivery outcome.
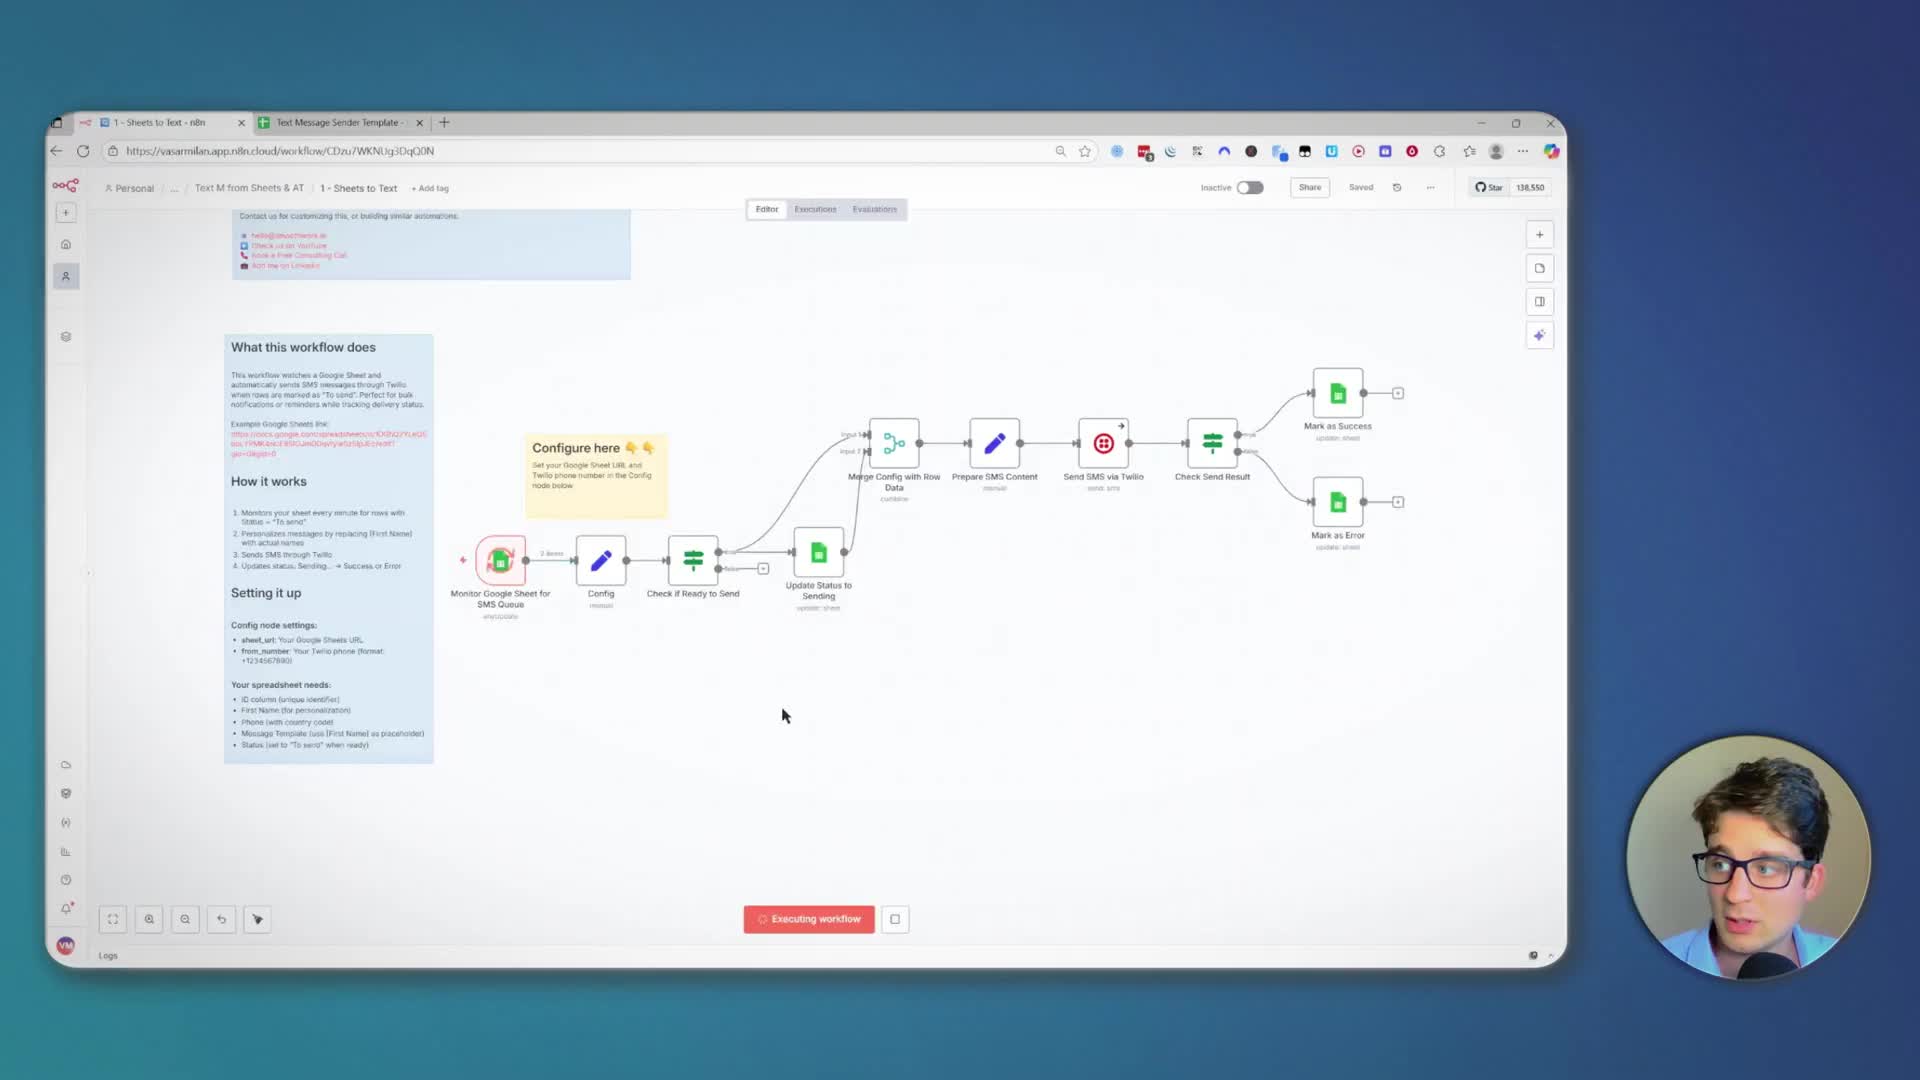
This workflow handles errors gracefully. For instance, if a phone number is invalid, the status will be marked as “Error” directly in your sheet, giving you a clear overview of which messages were delivered successfully.
Method 2: Automate Order Status SMS from Airtable
For a more advanced use case, we can trigger text messages based on changes within an Airtable base. Imagine an order management system where you want to notify a customer as soon as their order status changes, for example, from “Confirmed” to “Shipped”.
In this setup, changing the status of an order in the ‘Orders’ table automatically creates a new record in a separate ‘Status Notifications’ table. This new record contains all the necessary information, including the customer’s name, phone number (pulled from a linked ‘Customers’ table), and the new order status. An n8n workflow monitors this ‘Status Notifications’ table and sends a personalized SMS to the customer.
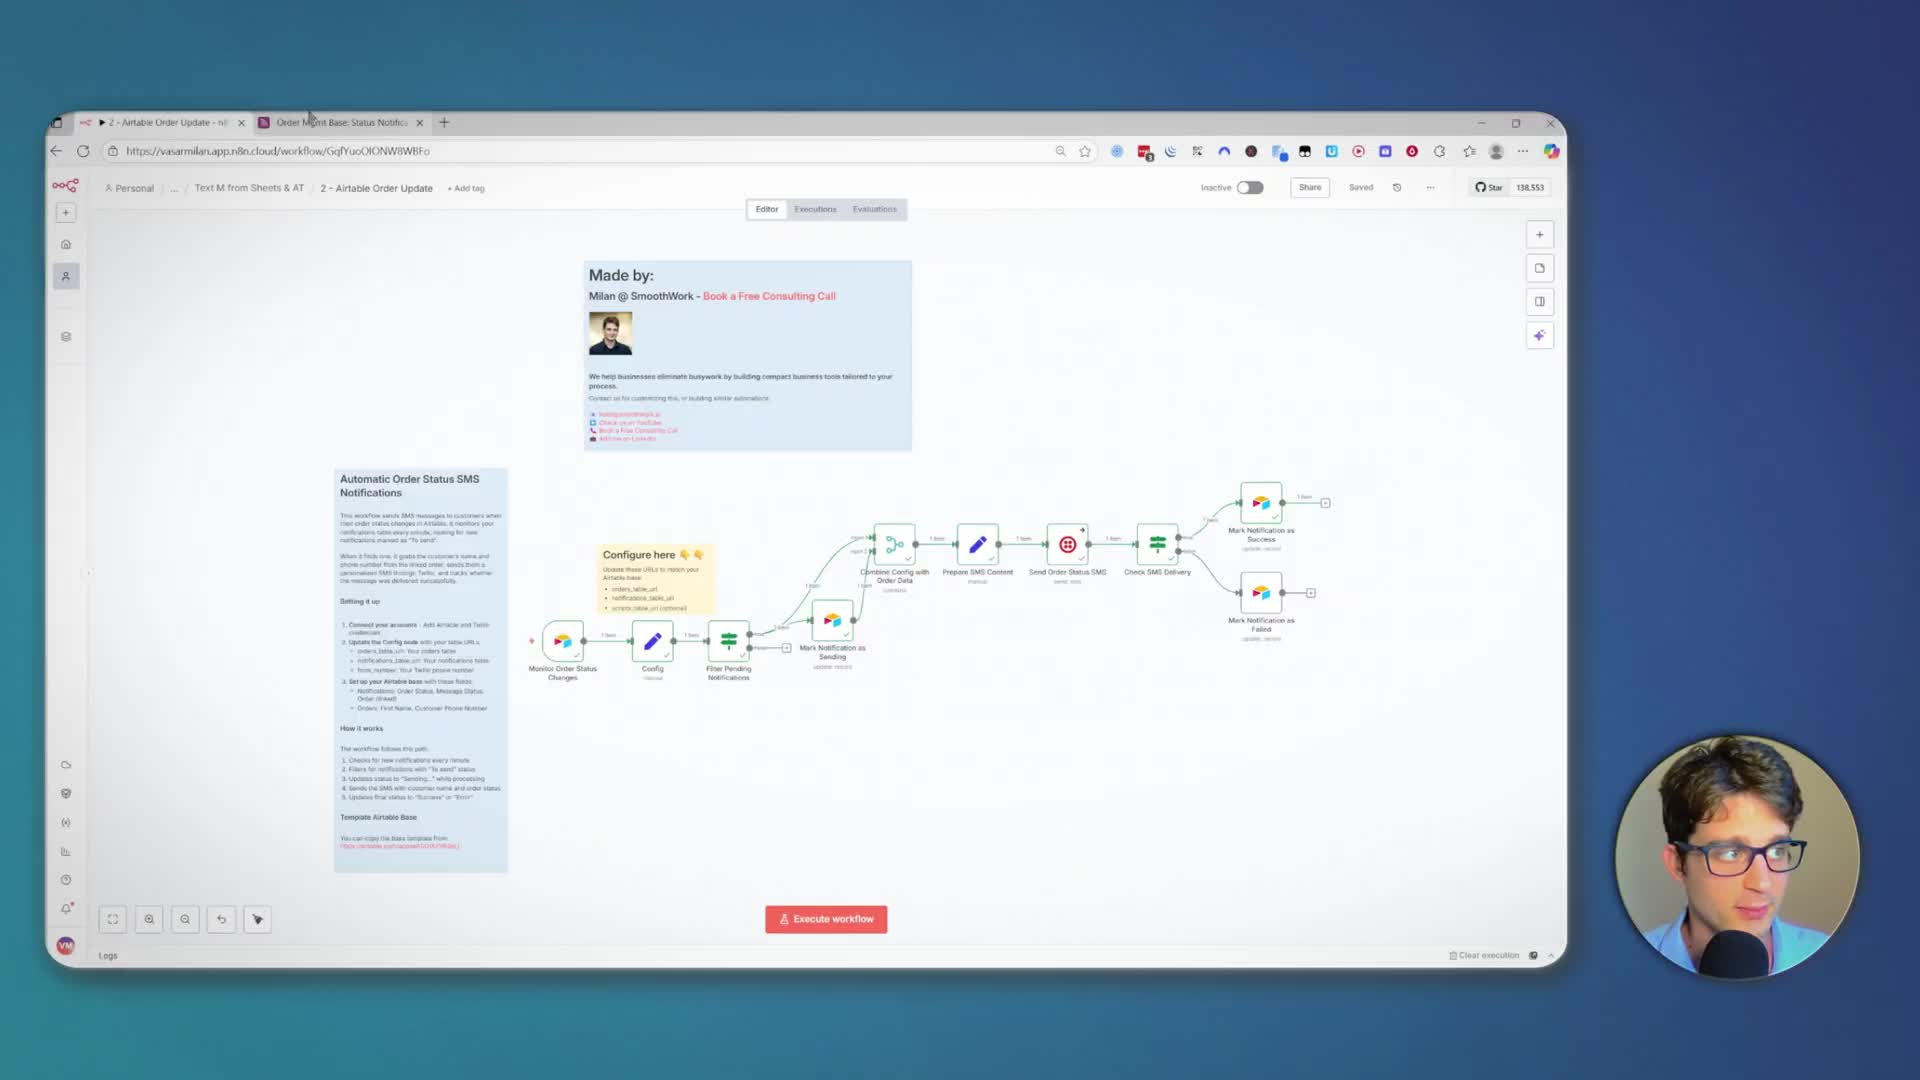
Once the message is sent via the Twilio API, the workflow updates the ‘Message Status’ in your Airtable base to “Success,” providing a complete log of all customer communications.
How to Get Started with the Free Templates
Both the Google Sheets and Airtable workflows are available as free n8n templates. You can find the links in the video description. Simply navigate to the template page and import it directly into your n8n Cloud workspace, your self-hosted instance, or get started with a new free n8n cloud account.

Step 1: Copy the Spreadsheet or Airtable Base
Before configuring the workflow, you need your own copy of the data source.
For Google Sheets: Open the Text Message Sender Template and go to File -> Make a copy. You must use your own copy because the automation needs permission to write status updates back to the sheet.
For Airtable: Open the Order Mgmt Base template and click “Copy base” to duplicate it into your own workspace.
Once copied, keep the URL of your new Sheet or Airtable base handy; you’ll need it for the n8n workflow.
Step 2: Configure Your n8n Workflow
After importing the template into n8n, you’ll need to configure a few nodes to connect your accounts and data.
1. Connect Your Data Source: In the first node (‘Monitor Google Sheet’ or ‘Monitor Order Status Changes’), connect your Google or Airtable account. Then, in the ‘Config’ node, paste the URL(s) of the sheet or tables you copied in the previous step.
2. Connect Twilio: To send SMS, you’ll need a Twilio account. You can sign up for a free trial, which works perfectly for testing (it will just add a “Sent from your Twilio trial account” prefix to your messages). From your Twilio dashboard, you’ll need three pieces of information: your Account SID, your Auth Token, and your Twilio phone number. Add these as a new credential in the ‘Send SMS via Twilio’ node.
3. Set your ‘From’ Number: In the ‘Config’ node, update the from_number field with your Twilio phone number.
Step 3: Activate and Test Your Workflow
With everything configured, you’re ready to go! You can either click ‘Execute workflow’ to run a manual test or toggle the workflow to ‘Active’ in the top right corner. Once active, the workflow will run automatically based on the trigger you’ve set up (e.g., every minute for Google Sheets or instantly for Airtable updates).
Customize and Build Your Own Automations
These templates are a great starting point. The real power comes from customizing them to fit your exact business needs. You can easily add more personalized fields, like including a last name or order details, by modifying the ‘Prepare SMS Content’ node in the workflow. The logic is designed to be clear and adaptable, allowing you to build robust communication systems with minimal effort.
If you have any questions about setting this up or want help building a custom automation for your business, feel free to ask in the comments or book a free consulting call using the link in the description.